This post is part of my series on the Windows Forms Model View Presenter with Data Binding sample program I wrote I call StockSample.
In the 20080818 snapshot of the StockSample program, I have a shell program (the main form) and a single view that is in a module called “StockLister”. I’m using some of the same terminology from CAB (Composite UI Application Block). The StockSample program doesn’t use anything other than the .NET base class library (and NUnit and DockPanel Suite). An application such as this might be better hosted on something like CAB, or you can develop your own simpler framework that is specific to your application. The benefit of going with an application framework that’s already developed is that (1) you don’t have to do it yourself and (2) you can more easily talk to someone else about your application. For something that will be developed and maintained by multiple developers over time, using something like CAB might be easier to get them trained up since they can troll the Internet for documentation and starter examples.
The module and the view represent a feature (or set of features) that tell a story (or part of a story). The view is what the user sees and interacts with. Most applications will have at least one view for the user to interact with. In the StockSample program, the module is called “StockLister” and its purpose is to allow the user to see all the stocks that are available, their prices, and the timestamp of the last price update. The view interface IStockListerView is very simple:
1: public interface IStockListerView
2: {
3: IStockList Stocks { get; set; }
4: }
It accepts the interface reference to the IStockList we have in the model. For this simple example, I made it so that the view can consume the model interface directly without modification. In a more complex application, you may need to map the model data into the view data in different ways (this is handled by the Presenter which I will discuss in a later post). For now, we will work with the simple example. Notice that there is no reference to anything in WinForms or ASP.NET. This view interface is a contract for a particular feature of the application (in this case, allowing the user to see a list of stocks with updated prices).
In the StockSample, this view is implemented as a WinForms UserControl. Here are the steps I took to build this control:
- In Visual Studio, create a new UserControl and call it “StockListerControl”.
- Make the control area bigger and drop a DataGridView on it. Set the DataGridView DockStyle to Fill.
- Click on the “Data” menu, then click “Add New Data Source…”.
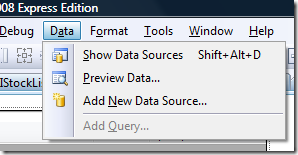
- Select “Object”, click “Next”.
- Drill down the tree (this tree is built from the classes in the project and external references) and select the “IStockList” interface. Click “Next”.
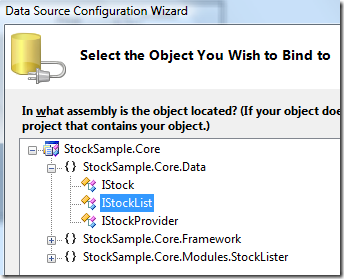
- Click “Finish”.
- Now, click on the DataGridView, then find the “Smart Tag” in the top right (the little white box with the black chevron), click it, then click the drop-down that says “Choose Data Source”.
- Drill down into “Other Data Sources”, “Project Data Source”, through a namespace or two, then click “IStockList”.
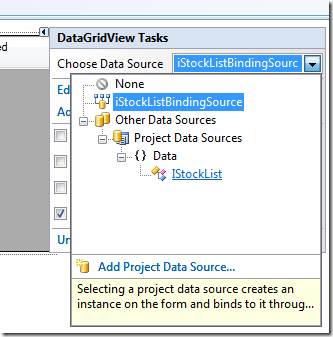
- The grid should be pre-populated with all the properties of IStock. Based on how I wrote the interface for IStockList, Visual Studio figured out that this is a list of IStock objects.
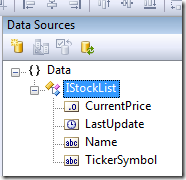
- You can edit the grid columns to change the titles, data format, and ordering of the columns to make it look pretty.
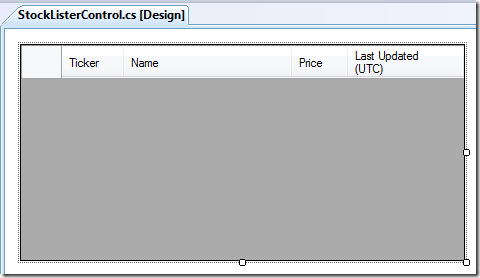
- You’ll notice a new component added to your UserControl at the bottom of the screen, I renamed it to “iStockListBindingSource” to look nicer.
Now that we have the control created, we write a little bit of code:
1: public partial class StockListerControl
2: : UserControl, IStockListerView
3: {
4: public StockListerControl()
5: {
6: InitializeComponent();
7: }
8:
9: StockSample.Core.Data.IStockList _stocks;
10:
11: public StockSample.Core.Data.IStockList Stocks
12: {
13: get { return _stocks; }
14: set
15: {
16: if (this.Stocks == value) return;
17:
18: _stocks = value;
19: iStockListBindingSource.DataSource = _stocks;
20: }
21: }
22: }
The only meat here is line 19. The “iStockListBindingSource” is what was created when we added the data source to the grid. The Forms designer already connected the grid to the binding source, now we just need to supply the data source to the binding source to feed to the grid. Due to the way we implement the model (using BindingList<T>), we get list update events for free.
At this point, all we’d need to do to show a simple form with just this control is to drop the control on a form, create an instance of the stock list, and pass the IStockList reference to the control. Coincidentally (or not), that is exactly what the Presenter does.
The Visual Studio Forms Designer has a lot of easy to use features for data binding. You can perform your own experiments on object data sources in Windows Forms applications. It makes it super easy to create a functional prototype application as well without touching a database. At work, I took half a day to create a fairly functional data driven application and not have to write a bunch of UI code. Most of the work was spent creating the Model layer, then throwing a UI together and wiring everything up was a snap.

No comments:
Post a Comment